

Wireguard is an extremely powerful VPN prototcol that is lightweight, open source, and extremely fast.
Wireguard VPN can provide a very effective means of accessing your network remotely. Allowing secure acess to computers, printers, network storage devices, security camera systems, and more.
This guide will walk through setting up WireGuard on a debian based system.
Installing WireGuard
To install WireGuard, first ensure that your system is up to date. Then from the terminal install wireguard using your package manager of choice such as below. We will also install qrencode. Though this is not needed it is helpful for configuring mobile devices.
sudo apt-get install wireguard
sudo apt-get install wireguard-tools
sudo apt-get install qrencode
Setting Up Server Configuration
The keys and configuration will be generated as the root user, and file permissions will be set so that the keys and config are kept secure. Keys and config will be generated within the “/etc/wireguard” folder. To navigate to the folder and change the permission execute the commands below:
sudo -i
cd /etc/wireguard
umask 077
We must create our configuration file. First ensure you have not exited sudo, and are still in the “/etc/wireguard” directory. Then the file can be created using nano (or your favorite text editor) as below:
nano wg0.confUsing the text editor populate the file with the following:
[Interface]
Address = 10.6.0.1/24
ListenPort = 51820
Generating Server Keys
Use the below command to generate the server private and public keys.
wg genkey | tee server.key | wg pubkey > server.pub Then add the private key to the configuration file using the command below:
echo "PrivateKey = $(cat server.key)" >> wg0.conf Registering The Server
To make it easy to start and restart the server, and ensure wireguard runs on boot we will register it as a service. Use the commands below (as root) to register and start the server.
systemctl enable wg-quick@wg0.service
systemctl daemon-reload
systemctl start wg-quick@wg0
Generating Client Keys
The keys will be generated as the root user, and file permissions will be set so that the keys are kept secure. Keys will be generated within the “/etc/wireguard” folder. If you are no longer in the wireguard directory, and/or have exited sudo. Repeat the command below, otherwise proceed to the next step.
sudo -i
cd /etc/wireguard
umask 077
Now that we’ve navigated to the wireguard directory as the root user and set our permissions we can proceed to generate the key(s). This step will be repeated for every client that a key is to be generated for.
client="clientname"
wg genkey | tee "${client}.key" | wg pubkey > "${client}.pub"
Now that we’ve generated our public and private key pairs we will generate our pre-shared key (PSK). This provides additional security. A unique pre-shared key should be generated for each client. In this step we will use the same name as defined by the client variable previously.
wg genpsk > "${client}.psk" Adding Client(s) to Server
Our newly generated keys must be added now to the server configuration. If the server already has a clients configured this process will add additional clients without overwriting existing ones. Generally the server configuration file will be called “wg0.conf”. If this is not the case, replace “wg0.conf” with the name of your configuration file.
Within the “AllowedIPs” section, the “x” must be replaced with the IP address to use for the client. These addresses should be in sequence starting at “2” (as “1” will be used for the server). E.g., if you are adding your first client below replace “x” with “2”.
echo "### Begin ${client} ###" >> wg0.conf
echo "[Peer]" >> wg0.conf
echo "PublicKey = $(cat "${client}.pub")" >> wg0.conf
echo "PresharedKey = $(cat "${client}.psk")" >> wg0.conf
echo "AllowedIPs = 10.6.0.x" >> wg0.conf
To load the client configuration the server must be restarted.
systemctl restart wg-quick@wg0Check that the server is running and configured correctly using the command below:
wg Setting Up Client Configuration Files
First we’ll create a configuration file for the new client below and add the previously generated private key to it. Replace “x” with the same number used previously to define this client. For the DNS line, supply the IP address of whatever handles DNS requests for your network (this may be your router). Replace “*YOUR PUBLIC IP*” with your public IP address. If you do not have a static IP look into a dynamic DNS service.
echo "[Interface]" > "${client}.conf"
echo "Address = 10.6.0.x/24" >> "${client}.conf"
echo "DNS = x.x.x.x" >> "${client}.conf"
echo "MTU = 1420" >> "${client}.conf"
echo "PrivateKey = $(cat "${client}.key")" >> "${client}.conf"
echo "[Peer]" >> "${client}.conf"
echo "AllowedIPs = 0.0.0.0/24" >> "${client}.conf"
echo "Endpoint = *YOUR PUBLIC IP*:51820" >> "${client}.conf"
echo "PersistentKeepalive = 25" >> "${client}.conf"
echo "PublicKey = $(cat server.pub)" >> "${client}.conf"
echo "PresharedKey = $(cat "${client}.psk")" >> "${client}.conf"
Copying Configuration To Client
If the client is another computer we can simply copy the “.conf” file to it. The windows wireguard client makes it easy to import a “.conf” file, which is covered in the next section.
Alternatively, if you are using a mobile client (i.e. a smartphone) the configuration can be transfered using a QR code. To do so, use the command below (qrencode must have been installed prior).
qrencode -t ansiutf8 -r "${client}.conf" This will produce a QR code that is scannable from within your terminal session.
Windows Client Setup
To setup the windows client start by downloading and installing it. The installer can be found at: https://www.wireguard.com/install/
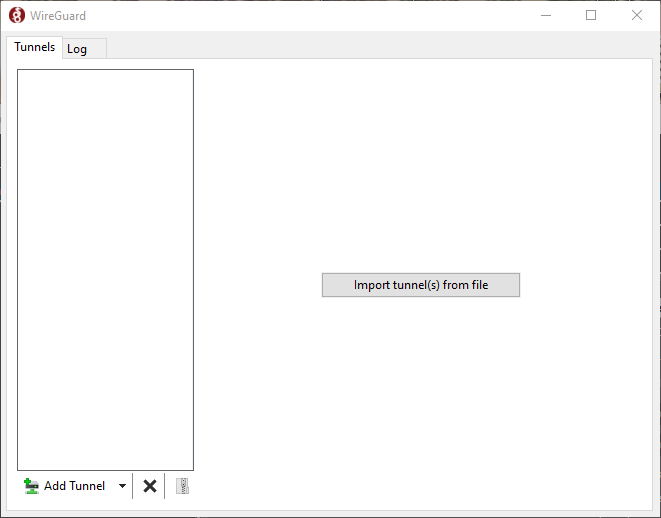
After install, launch the wireguard client and then click “Import tunnel(s) from file” to import the configuration file that was exported in the last step.

That’s it! You’ll then see the details loaded in automatically from the config file. Simply click “Activate” to establish the VPN connection.
Leave a Reply
You must be logged in to post a comment.